Friday, July 18, 2014

Hummus

I love to make my own hummus. It's so much cheaper than store bought. I also find that the flavor gets kicked up a notch because you can taste as you go. 

But sometimes hummus is boring. Let's be real. 

While looking for recipes, I found an awesome cheat sheet on the blog skinnymom.com. This is what I based my recipe off of.

Although a few of those recipes look awesome (I will def try on a later date) I tried the ranch version.


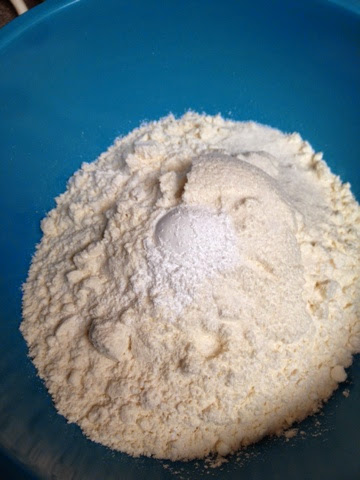
As you can see. The best part about the recipe is that you just throw everything in the blender/food processor and BANG! You got some awesome hummus. You can even add extra herbs or salt and pepper if it appeals. Ta Da!

Ps. Do you like my 1970's blender? I'm old school like that. Enjoy! 


Tuesday, July 15, 2014

Classic Chocolate Chip Cookies


Recently I was scrolling through old posts of mine looking for a recipe for chocolate chip cookies. When I discovered I had none, I was appalled. The chocolate chip cookie is definitely a "staple" and nothing compares to a perfectly baked batch. 

Some people like the flat-break-apart kind. They are still delicious, but I prefer mine with a little bit more puff, so I add more flour than what is suggested.

 If you want to see how ghetto my recipe is, check it out:
"Add-ins" refers to chocolate chips or nuts, even dried fruit. I usually eyeball it, but I use at least 1 cup.

Oh and it gets better:

Pretty simple, but created fabulous results. I also frequently make dough and freeze it in tubes. 

It is so nice when someone at work is like "oh hey, I haven't had a good chocolate chip cookie in a while" and you can say "I can solve that problem" and pop those babies in the oven that night (after cutting into individual cookies, of course).

I let them cool on a wire rack.

Awesome, right? They are perfect if you want to get your lifeguards at the pool to do things for you, like bring you Starbucks. 


Enjoy your summer, lovely people. Over and out.

OH WAIT! If you get the chance, check out my new Etsy shop and buy stuff from me. Go to www.etsy.com and search for the store "sassystauffer." BUY THINGS.


Tuesday, July 8, 2014

Home Made Cereal

When I made this recipe, it was supposed to come out with a texture similar to a flake or wheat thin. 

The end result was still delicious, but different than cereal. If you have ever eaten those "Honey and Oat" bars from Nature Valley, these tasted EXACLTY like that. 

I guess in retrospect I could have rolled them thinner, but they were breaking apart, so I decided not to. 


Here is the recipe I used from Better Homes and Gardens. 
  • Makes: 6 servings
  • Yields: 24 squares (1/2 cup) each
  • Prep: 20 mins
  • Bake: 30 mins 325°
  • Stand: 20 mins
3 users rated this 4.5
Crunchy Oat Squares
Ingredients
1 1/2 cups rolled oats
1/4 cup oat bran
1/4 cup packed brown sugar
tablespoons almond butter
tablespoons water
tablespoon honey
1/8 teaspoon baking soda
1/8 teaspoon salt
Nonstick cooking spray

Directions 

1. Preheat oven to 325 degrees, and spray a baking sheet with non-stick spray.
2. Place the oats in a food processor or blender and grind into a powder.
3. Combine everything else in blender or food processor and mix together.

4. Place mixture on baking sheet and press or roll into a square, about 1/4 an inch thick (you can vary on this if you choose).

5. Cut into sections. You can do mini 1-inch squares for cereal, or longer rectangles for granola bars.
6. Bake at 325 degrees for 20-25 minutes, or until brown around the edges. 

Then they come out looking fabulous. Store in an air tight container. 

Also, I made some mango salsa (mango, cilantro, onions, red peppers and seasonings... BAM).
And some pickles, ala my hero Martha Stewart.


Both of which you can find in earlier posts on my blog. Anyway, stay cool. I am out lifeguarding at the pool today and it is 1,000 degrees. Give or take. Love!!! 

Monday, June 23, 2014

White Chocolate Blondies


Blondies: are they second place brownies? I think not. These Blondies that I made were not just "cookies bars." The difference is that brown sugar replaces the cocoa powder. Super sweet and super fabulous. 

This is the recipe I followed:

White Chocolate Blondies Recipe

Yield: Makes 9 Blondies

Ingredients:
-1/2 c butter (melted)
-1 c tightly packed brown sugar
-1 egg, lightly beaten
-1 tsp of vanilla
-1/2 tsp baking powder
-1/8 tsp baking soda
- pinch of salt
- 1 c all-purpose flour
- 1/3 c white chocolate chips ( optional: about another 1/3 c for melting)

Directions:

1. Preheat oven to 350 degrees. Lightly butter and flour an 8x8 pan. Whisk together the melted butter and sugar in a bowl.

2. Add the egg and vanilla extract and whisk.

3. Add the rest of the ingredients, with the white chocolate chips last (you can also add nuts or anything else your heart desires at this point.).

4. Pour in the pan and spread evenly. Bake for 20-25 mins or until a toothpick comes out clean. Allow to cool. Cut into squares and serve.


5. (Optional) I chose to melt a little bit more white chocolate to drizzle on top for decoration purposes. If you choose to do this, melt in microwave at 30 second increments and stir inbetween. 


Their deliciousness was made valid when some random dude at a party I took them to said "I'm on my 5th Blondie..."

And I was like yessssssssss.

Thursday, June 12, 2014

Coconut Macaroons

I am all for being indulgent. But every once and a while I have to slow down and hush my inner fat kid. This recipe was fun to make, and each cookie is a little under 100 calories. 


This is the recipe:

Ingredients:
3 cups shredded coconut
1 1/2 T cornstarch
3/4 cup sugar
3 egg whites
1/2 tsp vanilla extract
4 oz bittersweet chocolate, broken up (optional)

Directions:
1. Heat oven to 350 degrees 
2. Place all ingredients but the chocolate in a heatproof bowl and mix well.
3. Set the bowl over boiling water (or use a double boiler). Heat and stir until mixture thickens, then remove from heat and set aside, about 4 minutes.

4. Scoop out macaroons (about a tablespoon) placed in an ungreased baking sheet.

5. Bake at 350 degrees for 10-15 minutes or until lightly golden but still soft and chewy. Remove to wire rack to cool. 

Mmmmmmmm just like that.


If using chocolate:
Place chocolate in microwave proof bowl and heat at 1 minute increments until completely melted. I also added a small amount of coconut oil for flavor and so that the chocolate hardens nicely. 


Dip the bottom of cookies in the chocolate and place back on cookie sheet to harden. 

 I had left over chocolate, so I also drizzled it on top. If you need to harden quickly, leave in the fridge or freezer to cool. 


There you go! 


Monday, May 12, 2014

Simple Roasted Vegetables

I have been obsessed with roasting vegetables lately. Namely carrots. I do a huge batch Sunday night and eat them throughout the week. Usually, they don't last a week though. 


I'm not even going to use a recipe because it's that easy. Ready?

Choose your vegetable. 


In this case I used parsnips, carrots, and onions, 


1. Spray baking pan with oil spray.
2. Add vegetables.
3. Spray with oil spray. (You can drizzle with olive oil, but since I am a fatty, I try to cut out anything extra in my diet.)
3 1/2. Add seasonings... definitely salt, pepper, or can be creative with Old Bay (Yay Baltimore!!!), oregano, dill, or nutritional yeast.
4. Cook at 450 degrees. Check and stir every 10 minutes. 


5. When charred and moist, remove from oven. It usually takes about 30 mins. I try to busy myself with other tasks like dishes while they are cooking, so I usually have no idea how long they've been in there. I moniter them. 
6. (Optional) if I feel like speeding the process, I will flip my oven to broiling. I am kind of in love with the broiling, charred flavor. I always crack my oven when I do this though, because otherwise the smoke alarm in my apartment goes off. 

And tadaa!!! Devour.


Now, if you want to change up your vegetable to a non-root type (broccoli, cauliflower, etc) I might bump the temp down to 350 degrees. I do the high temp because I like the way they char. Weird, I know. If you prefer the low and slow method, go for it. 

Have a happy week! Any suggestions for what I can tackle next?


Sunday, May 11, 2014

Chocolate Bread Pudding

I am the queen of repurposing things. 


I made "brookies" the other night. For those of you wondering, that means a brownie and cookie together in one. The recipe that I used was a "healthy" recipe, which I am guessing is my first mistake. Anyway, it called for whole wheat flour and they were pretty dry. I was not pleased. Usually I make some tweaks in recipes... But this one I did not. And they were STILL dry/not sweet enough. 

So I put icing on them. Good, but still not good enough. 

Then I remembered: Bread pudding fixes dry things. Sooooooooo this was ultra experimental, but I went for it. I thought the idea turned out awesome. 


I halved it because of the amount of brookies I had. I was amazed at how simple it was. This is the recipe from AllRecipes.com:

Ingredients 

Original recipe makes 1 - 8 inch square panChange Servings
  1. Preheat oven to 350 degrees F (175 degrees C).
  2. Break bread into small pieces into an 8 inch square baking pan. Drizzle melted butter or margarine over bread. If desired, sprinkle with raisins. (I omitted these).
  3. In a medium mixing bowl, combine eggs, milk, sugar, cinnamon, and vanilla. Beat until well mixed. Pour over bread, and lightly push down with a fork until bread is covered and soaking up the egg mixture. 
  4. Bake in the preheated oven for 45 minutes, or until the top springs back when lightly tapped.


Check out those bubbles. Results were great. Decadent, moist, and dense. It is something I might serve at a party of for a group with ice cream. Eating it on its own might be a little much. 

Because of the whole wheat flour, I will confess, it was a little "chewier" than a normal bread pudding would be. I didn't mind it. Boyfriend ate it but said "I don't know..." The reason I did this was just to see how things other than bread can work in a bread pudding. I have used bread, cinnamon rolls, and even bagels before. You can experiment on your own, see what else can work. It just needs to be a relatively stiff before you use it. 

All that mattered to me was that there was chocolate in it. Late Saturday night alone in the kitchen, I really didn't care about how chewy it was.
And with that, I'll leave you to your week. Love!! And Happy Mother's Day!


Wednesday, May 7, 2014

Kahlua Fudge

I have been trying to get some posts under my belt for like two weeks now. With the end of the school year coming, it has been one big ol' cram session. It will continue being one for the next month. 

So I was naughty and made some fudge.


Lawdy, this stuff is dense. And sinful. 


The recipe I followed was pretty complicated, and was also meant for bourbon instead of Kahlua. I simplified it, and changed up the toppings (chopped creme filled egg, semi-sweet chocolate chips). I wanted to add nuts also but the boyfriend wrinkled his nose at that, so it was a no go. But since I am poor and had Kahlua on hand, this is the recipe I ended up making. Fortunately, it didn't require any candy thermometers and can actually be done all through the microwave rather than the stove top. 

This is the recipe I used:

Print

Loaded Chocolate Bourbon Fudge

YIELD: MAKES ONE 8X8 PAN, ABOUT 16-20 PIECES OF FUDGE


TOTAL TIME: 1 HOUR

ingredients:

20 ounces semi-sweet chocolate, chopped
1 (15-ounce) can sweetened condensed milk
1 teaspoon vanilla extract
3-4 tablespoons bourbon
10-12 caramel-filled chocolates/fudge, such as truffles of Ghiradelli squares, chopped
3/4 cup chocolate toffee pieces, like Heath toffee chips
1/2 cup milk chocolate chips
4 ounces milk chocolate, melted

directions:

I covered a pan in plastic wrap rather than spraying it with non-stick spray. It made for MUCH easier clean up.


Add semi-sweet chocolate to a double boiler, and melt completely. One melted, remove from heat and slowly add in sweetened condensed milk and vanilla extract, stirring with a large spatula until mixed. The chocolate will be thick. Begin in stir in bourbon 1 tablespoon at a time - mixture is going to get super thick but slowly stir and just fold the chocolate mixture over until combined. Use the spatula or a large spoon to spread the chocolate in the pan. It will be thick! Don't worry about the top looking pretty because we are going to cover it up. Just spread it evenly. Place in the fridge for 10 minutes to set.


Melt the milk chocolate and remove the pan from the fridge. Take a few small spoonfuls of the milk chocolate and using the back of a spoon, spread it evenly over the top of the fudge. 


Immediately cover it with the chopped caramel-filled candies, chocolate chips and chocolate toffee pieces. Take remaining milk chocolate and drizzle it over the top to set some of the loose candy. You can also use any additional sweetened condensed milk that may be left in the bottom of the can and drizzle it over top. Let set in the fridge for 30 minutes or so.


When ready to cut, fill a large cup with hot water. Dip a sharp knife into the water, then blot on a towel. Use knife to cut fudge into your desired size of squares.

Note: the melting can also be done in the microwave. I suggest melting the chocolate first on medium power in 30 second increments, stirring after each time. Once melted, add in remaining ingredients and stir until smooth. (I actually pushed the toppings directly into the top layer, rather than rebel ting and adding another layer of chocolate. Plus, I was running out of chocolate).


[adapted from my mocha coconut fudge]


I halved this recipe, and I still had a lot. Way more than my waistline needed. I kept coming back for more. If you want to try fudge, I definitely recommend trying this! And with that, I'll sign off.

Hang in there. It's almost Friday.