Monday, March 31, 2014

Oreos + Love = Oreo Truffles

So I had left over Oreos... And had to make something from them. 

The only thing I changed was the candy coating... I used semi-sweet chocolate instead of white chocolate. I'm not into breaking the bank for some boyfriend truffles. 

The recipe was super simple. Basically just throw everything in a blender/food processor and turn that baby on.

Yes, those are home made Oreos.


Recipe is found here:

http://www.crazyforcrust.com/2014/01/peanut-butter-covered-oreo-truffles/


Confession: I licked all of the remainder chocolate off of everything that it touched.


The best way for them to set quickly is to throw them in the freezer. I am
Personally a fan of putting everything in the freezer.


So anyway, boyfriend verdict was: "addicting."


WIN.


Saturday, March 29, 2014

Guys... Spinach Dip

Today I am deciding to post about my awesome White Bean and Spinach Dip. Healthy? Yes (if you don't eat the entire pan). Experimental? Yes. It is very similar to what a spinach and artichoke dip would be without all the extra fat and calories. I found the recipe here:

http://www.myrecipes.com/recipe/artichoke-spinach-beam-dip-50400000111145/


If you know me well, you know that I am an obsessive Pinterest viewer. This recipe comes from Pinterest. I literally can't even remember who the first person was that told me about it, but I am both thankful and resentful for that person. 

Anyway. You basically mix the cheese and other things together, then add the spinach/artichoke. Being the poor 2nd year teacher that I am, I didn't feel like buying artichokes, so I just used extra spinach. Boyfriend was okay with this. 

Instead of Mozzarella, I had 1/2 the fat provolone to top it with. Still delish.

Eventually, you throw everything together and then pop it in the oven.

Make sure to watch it carefully. I have been burning things a lot lately, so I was really watching this puppy. Once it bubbles and/or turns brown on the edges, you're ready to go.

I also had some home made tortillas from another night (if you viewed my last post, these were the tortillas that I made from the failed yeasty dough meant for rolls that didn't rise), so I cut them up into pita chips. 

I popped those suckers in the oven along with the dip, and they warmed up perfectly. They also got a little bit more toasted on the edges. 

The end result was pretty pleasing. I felt food about eating white bean dip that didn't have butter and a ton of cheese in it. Not bad for a weeknight appetizer.

Boyfriend verdict: s'good. 

I will have more to come later. Next: Oreo Truffles.'

Monday, March 24, 2014

For Every Success, There Are 5 Fails

This weekend I made a bunch of things. These glorious cupcakes turned out fabulous. We'll say they are vanilla flavor, though those close to me know otherwise.


I also made fabulous granola with this recipe...


And didn't take any pictures because I burnt it :(. As you can see, I stole this recipe from Pinterest.

After that, I also made some hoagie rolls to go with a crockpot meal I made. Fail. The yeast didn't cooperate and I had to made tortillas so they didn't become bread bricks. Again, no pictures.

But finally!! A success!! I made some whole wheat rolls. They turrned out perfect: dense, extremely moist, and sweet. 

The only changes I made were adding 3/4 c oats (this was totally an experiment, had no idea how it would go. It added a nice natural sweetness and added more whole grains... The reason why I did it.) and 1/4 c self rising flour in place of 1 c all purpose flour. Whole wheat flour gets super dense and crispy, and changing it up with the other grains gave it a great texture.


As always, I could not stop eating the bread as it came out of the oven. CARBS! Yes!! 

The recipe I used can be found here.

http://www.tasteofhome.com/recipes/no-knead-whole-wheat-rolls


Anyway, don't feel bad about failing every once in a while. As long as it's still edible. 

Monday, March 17, 2014

Pickles


Martha Stewart has some pretty fantastic recipes. I'm actually positive that the recipes she creates are pure perfection, assuming the cook is also flawless. 

Lately I am into her pickle recipe. Generally you use pickling cucumbers/regular cucumbers, but I love that you can pickle other vegetables if you want. Everything from peppers, onions, garlic, or (cooked/steamed) carrots or cauliflower.


They have a sweet/sour flavor. I have also made straight up dill pickles (the strickly salty kind) by fermenting them for a few days then sticking in the fridge when they get the right flavor. I am into sweet/salty more right now. Not sure why... Just am! 

This recipe involves a heated mixture that is poured over the vegetables. They marinate for a few hours (next day is ever better!) and have a fabulous flavor. 
Here is the recipe I used. It makes 3 1/2 cups.

INGREDIENTS

  • 3 cups white vinegar
  • 1 1/2 cups sugar
  • 2 teaspoons coarse salt
  • 1/2 teaspoon mustard seed
  • 1/2 teaspoon celery seed
  • 2 to 4 small red chiles (optional)
  • 1/8 teaspoon ground turmeric
  • 1 1/2 cups fresh dill fronds (about 1 bunch)
  • Prepared Vegetables

DIRECTIONS

  1. STEP 1

    In a medium saucepan, combine white vinegar, sugar, salt, mustard seed, celery seed, red chiles (optional), and ground turmeric. Bring to a boil, stirring to dissolve sugar. Arrangeprepared vegetables and dill fronds in one or more jars. Pour hot brine into jar to completely cover vegetables and seal jar. Refrigerate until cool, about 2 hours (or up to 1 week).

Make sure you stuff those jars as full as you can get them! You want all of the cucumbers to be covered when you pour the liquid over them.


I only changed two things.

1.) I substituted a little more than half of the sugar for Truvia, or stevia sugar. I could not tell the difference. Just make sure you know the conversion rate for using stevia... It has much more sweetness per teaspoon than normal sugar.
2.) I did not use fresh dill (I know, Martha is saying SHAMMMEEEE). In a perfect world, I would always have fresh dill always on hand. Unfortunately, I do not have the money, time, or patience to maintain multiple fresh herbs, so I just used about a tablespoon of dry dill. 
3.) Okay, 3 things. I added dried chilies instead of the actual chile pepper. Sometimes I throw in other herbs like coriander and anise seed just to see the flavors that happen. It's cool to see if it adds an extra kick. Usually not. HA! 


The cool part is you don't need to "can" them. Just find an airtight container (I find jars to be best), seal when still hot, and throw directly into the fridge.

This time, I used cucumbers, whole garlic cloves, and sliced onions. Last time (as you can see) I also included sweet peppers. The flavor was AWESOME. You can even throw the garlic/onion/peppers in when cooking a stir fry or similar dish, and it adds a really nice lil sum'sum.


Aight. If you like my stuff, SHARE IT!!! 
Happy St. Patrick's Day! Now go drink some...

...root beer.


Saturday, March 15, 2014

Muffin Tops

I have been trying to make banana bread for a while. The version that I tried is pretty healthy... It's a Weight Watcher's Recipe. I am, however, pretty sure I ate enough of it after it came out of the oven that it was no longer healthy. I can't handle fresh bread. It's so good.

I split it up when I made it to create a mini loaf and a few muffins so I could try out my "muffin top" silicon baking thingers. Hilarious.

The recipe I used is this.

Banana Applesauce Bread

Instructions

  • Preheat oven at 160 deg C (325 F). Grease 7X7" tin or a 9X5" bread tin. 7x7" cooks faster. 2 Mix applesauce and sugar in a bowl. If using unsweetened applesauce, add about 2 tablespoons of sugar extra. 3 Add bananas and mix. Add flour, salt, vanilla essence and baking soda. Mix quickly but thoroughly. 4 Pour into tin. Sprinkle with some brown sugar and cinnamon powder. Put into oven immediately. 5 Bake till a knife inserted in the centre comes out clean (A little mashed banana on the knife is ok as there's so much fruit. If in doubt, taste to see it doesn't taste of raw flour). 6 Ovens vary so always check about 5mins before when you think it will be ready. About 50mins in a fan-assisted oven for 7X7" tin. Read more: http://www.food.com/recipe/yummy-healthy-banana-bread-216247#ixzz1pRUhnizn

First, mix the dry ingredients and wet separately, just like you would in any cookie recipe. Anyway, the bread was SUPER moist and delish. There were about a handful of chocolate chips in it, and it really didn't need more. 

Make sure those bananas are ripe! The browner the better.

Did I lick the leftover batter after everything was in the oven? Absolutely. 

I put the lil' silicone muffin things in a regular pan when I baked them in the oven. It worked great. I would advise you to check them much sooner than the bread. They cook much faster.... Almost half the time.
I can't get over how hilarious they are.

The bread loaf puffed up nicely, and had a nice crispy top. Looks dark, but it is not burnt. 


Love it. Have a good weekend, lovely people. 


Sunday, March 9, 2014

Ice Cream Birthdays

I made an ice cream cake. The recipe was simple because it involved mostly pre-made ingredients, but it was quite the process. This was what I used:


It works best if you allow each layer to freeze before you add the next ones. You should give the ice cream layers at least an hour or so to solidify before adding the next step. It doesn't say to do this in the recipe, but I definitely recommend it. The bottom layer is shown below (these are the Oreos I made last week!)


For my second layer, I also decided to get a little creative and mix up my own ice cream from a vanilla base. I added some crushed peanuts, syrup, and crushed Reese's Peanut Butter Cups by mixing it all together with the ice cream in a huge bowl, then smoothing it out as a layer on the cake. If you want nicely defined swirls, don't over mix.


The boyfriend loves those guys, so I had to incorporate them into the recipe somehow. I also saved about 5 of them for crushing and adding to the top. 


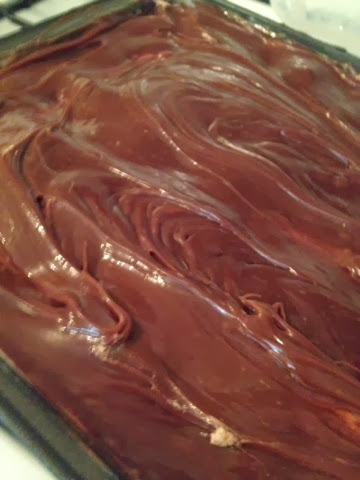
Also, I used a different recipe for hot fudge than the one that was listed. You can follow that one, or just research any online. They all pretty much follow the same format. See the recipe I used below.
Original recipe makes 1 quartChange Servings


  1. Combine butter, cocoa, sugar and evaporated milk in a saucepan over medium heat. Bring to a boil and boil for 7 minutes. Remove from heat; stir in vanilla. Carefully pour hot mixture into a blender and blend for 2 to 4 minutes. Serve immediately. Store in refrigerator.


And finally, the cool whip layer on top finished it off. Licking the spoon after is a requirement. 


Formulating the crushed Reese's words to form "BEST" is optional... That's an inside joke that is neither here nor there.


It tasted so good. Last night we got back from a huge dinner, and I may or may not have sampled some of it after the boyfriend went to bed. I had to make sure it turned out okay, right? I wanted to get a picture of the perfect layered inside, but the fudge decided to ooze out. Fail. But the taste. Oh the taste. Heavenly.


No judging. Holla at me,

K.